Tag: Textured walls

Before the Christmas break we tackled one last major project the Versace Vancouver store on Thurlow and Alberni in downtown Vancouver. Getting the opportunity to work on the Versace Vancouver store was a challenge in every aspect. The combination of a legendary brand, working on challenging substrates, and an extremely tight time line to be ready for the Vogue party, made it a truly memorable project. The uniqueness of the interior design was incredibly inspiring. Specifications called for curved wood cabinetry and floating glass that had to be united into a flawless white distress Italian lime plaster sealed with Marsi soap wax to give it a velvety touch and durability. With trades working around the clock, the only option was to be positive and work together as a team. Our team managed to complete almost 30 days of work in under 10 days, those were not your average shifts. If asked to do it again I would not hesitate to say yes! Check the story on Retail Insider

Versace Vancouver Italian Lime Plaster from Darrell Morrison on Vimeo.

Here are some of the before shoots

When I was approached for this fireplace in the spring of 2015 I thought to my self wow what a beast, this fireplace would be a killer retrofit from the old style of red brick. The clients had done there home work and wanted an Italian lime plaster for its beauty and versatility in colour choices and texture, we ended up using Cadoro Italian Lime Plaster Intonachio in a two tone custom colour made in house at our studio. From start to completion we handled all the construction.

Integrated Italian Lime Plaster Fireplace from darrell morrison on Vimeo.

Tadelakt pillars inside and out, Fibercrown mouldings installed by and painted to resemble limestone. Italian lime plaster inside and out, antique mouldings, stencils, lath and plaster domes finished in silver leaf even the fountain base was finished by our hands. This house will be one to beat in our book of projects, a true masterpiece and an amazing group of people pulled this all together.

Italian Villa Lime Plaster Full Interior & Exterior Vancouver BC from darrell morrison on Vimeo.

Tadelakt pillars inside and out, Fibercrown mouldings installed by and painted to resemble limestone. Italian lime plaster inside and out, antique mouldings, stencils, lath and plaster domes finished in silver leaf even the fountain base was finished by our hands. This house will be one to beat in my book of projects, a true master piece and an amazing group of people pulled this all together.
-The Villa Work Performed-

-Exterior-
Two tone venetian lime plaster exterior

Install all fibercrown foam mouldings on exterior of house including arches windows and base.

Lime paint all mouldings to resemble lime stone

Tri-color Tadelakt lime plaster pillars

-Interior-
Smooth Venetian plaster walls including all ceilings and walls throughout house

Main interior fireplace install fibercrown, float substrate plaster to resemble walls and carved limestone

Plaster pillars and arches in Tadelakt with glaze and wax for an aged look

All domes finished in lath and plaster then decorated with silver leaf.

All wood beams on interior wood grained

The process, the projects, the finished product: This is an inside look into how I create my Venetian plaster projects, making them come alive.

In this video, you’ll see steps used to create my Venetian plaster projects, including completed project photos of Classic, Carrara, Intonachino and Tadelakt plaster applications.

When it comes to my projects, it’s Stucco Italiano Italian lime plaster that is my one and only choice, and I think this video shows you why. When you think interior stucco think Authentic lime based Venetian plaster.


Its not everyday your dreams come true, this week for me they did. I have been dreaming of lime plastering this house for quite sometime and starting June 1st I get to do just that.

before

Not only are we Lime plastering this entire Tuscan villa, we also will be applying Tadelakt Lime plaster to all the columns and Lime painting all the fiber crown trim and moulding details of the full exterior. This home is going from new to old in a matter of a few months.

Be sure to check back in the coming weeks as this Italian lime plaster exterior unfolds


What makes a beautiful Lime plaster finish so unique? In my opinion its the architecture and interior design taste of the clients. With clients in Burnaby, Vancouver, White Rock and all over the Lower Mainland, Architecture and Interior design is always changing. Lime plaster is the perfect material of choice that follows. Think custom fireplaces, feature walls or even full interiors Lime plaster projects.

Does your master bedroom have Architecture with curves like these? Italian Lime plaster is just the thing to bring these walls to life.

Does your style scream for a Tuscan Venetian plaster like this house?

Possibly you have a fireplace that has been needing the recent uplift. Could you dream of a sleek fireplace in Tadelakt Lime plaster?

If you know me, you know I’m a busy guy. It’s work, work, work, these days, and when it’s not about work, it’s about time with my wife, my girl, and the pups.

Needless to say, like most of us, I seldom get to do the projects around the home that I dream of doing.

That all changed in the last month, because not only did I finally get to do a bit of home reno that my family gets to enjoy, but I also got to try something I’ve wanted to do for a really long time — a heavy-duty Italian venetian plaster treatment to a bathroom shower stall.

This work was done in our main-floor bathroom, which had been wanting TLC for a while.

Doing any project for the first time, especially when it’s a bathroom, can make it hard to estimate all the work involved, so getting a chance to explore the process on my own time was great.

It was a major project by the time I finished, as you can tell by the end results, but what did it take to get there?

Here’s how the Home Shower Venetian Plaster Project evolved, start to finish.

This ’70s bathroom came with tons of cedar, which all had to come down. Luckily, it was installed by someone who didn’t make much effort to do it right, so only a couple nails in each board ensured they popped right off. Removing the shoddy work made investing time in improving the room that much more satisfying.

The first thing I wanted to do was move the shower-head up by about two feet. No one wants to crouch for a shower.

Before now, I never had the need, or an opportunity, to work with copper. I decided I’d take a kick at the copper can instead of calling a plumber, and working with the pipes was easier than I expected. I might do the odd fix-it job here and there now, but I’d certainly never do my whole place.

Next, I installed plywood. I’m sure some of you building guys out there are wondering “why not concrete board instead of plywood?”

It’s a preference, really. I find plywood’s just easier to work with, and it comes in big old 4×8-foot sheets, making for less cutting in some situations, but, most importantly, I find plywood’s a big help when it comes to installing lath. (Shown later.)

Next up was installing the water-proof membrane. Obviously a quality project is needed for a shower, and I used a local company’s product, called, “SuperSeal” you can learn more about it here.

Continue Reading..

When you’re a guy working in the building trades, it’s not very often you get to travel for work, let alone work in a place like Banff, Alberta. This fantastic retreat in the mountains has been a dream-like project for me, and I’m happy to share with you this video of a walk-through of how the project’s coming.

As the build got further along, more plaster work got added to my slate. I love an owner getting excited about my technique and wanting more as the work progresses, especially in a place like this. By the end, Stucco Italiano’s Italian plaster was used throughout, stretching from the bottom up to the third floor.


Please set your viewing to high-def for all the detail!

Take a look at the waxed deep magenta plaster walls in the powder rooms, which includes that awesome entry feature and incorporates those subtle smooth textures across the walls and ceilings, on all floors.

Why would you want to use Italian plaster over both walls and ceilings? You have to consider the characteristics. No paint will match the beauty or durability over the long-term like Italian lime or Venetian plaster, and when you’re creating a mood in a room, why would you neglect the ceiling?

When the colour is fortified right off the bat, as I hand-mix plasters for application, including base coats, it gives a rich layered finish that doesn’t look man-made — it looks like it just belongs that way. It’s natural, rustic, and amazing for creating a mood in big and small spaces.

Lime plaster builds an atmosphere you just can’t get with only paint, and I’m a painter saying that.

When you’re talking about any kind of art or space, lighting means everything, and it’s definitely true with Intonachino plaster approaches I use in my Venetian/Italian lime finishes. As light moves across the room, during dusk through to dawn, and the light shifts from season to season, it changes the way the plastered surface appears, and you’ll always notice something different. It’s almost like your walls are a living part of your space.

This video will provide a perspective on the feel created with these finishes, but if the same video was shot at different times of day, you’d get more a sense of why I say that lightning — natural or electrical — is plaster’s best friend.

It’s been a while since this amazing journey began. Have a look at how far we’ve come, and how this plaster came to life. Click here to see the beginning blog posts.

Another week has come and gone, and I’m a week behind on my blogging — with pretty good reason, too!

My crew has been working really long days and straight through their weekends in order to keep up with production on the house, since the trades are all making huge advances these days, and there are a lot of pictures to prove it.

If this is the first time you’re dropping in to looking at this project, I’d suggest going back to the beginning of this amazing Rocky Mountains Italian lime Venetian plaster project in Banff, right here.

I’ve been loving the level of work from everyone involved in this project. Get a load of this amazing buffalo design in the stone flooring, at the main entrance.

It’s almost like a giant puzzle, isn’t it? I bet there’s a lot of people who’d love to put a puzzle this size together, but I sure wouldn’t. The precision needed to lay this tile is a pretty rare skill, even at this level of the game.

Talk about a mistake getting set in stone… Not for me, thanks. I’ll leave that to the pros.

Here’s another look at the stone buffalo, from the second floor.

A little trivia for you: Did you know that Alberta’s home to one of the two last continually wild North American buffalo herds?

After the Venetian plaster finish on the kitchen ceiling got polished off, other teams got to put the beams up. I’m loving the look and the contrast of the smooth wood against the rustic lightly-pitted plaster, but can’t wait to see it stained.

Another shipment of material showed up this week, which meant more walking up hills and stairs covered in snow, hauling plaster supplies.

Ahh, the boring world of drywall… but progress here means moving on to what we love, the plastering.

Details are critical with a masterful build like this one, where everyone’s brought their A++ game. Here’s Kelvin getting all those reveals smooth and level. It’s looking great, and we know he’ll keep it up.

The beams in the master bathroom are installed now, getting closer to a  finished look.

The outside of this place is getting just as much detail work as in the inside. Here are some shots of the exterior. Now this is some serious craftsmanship going on here.

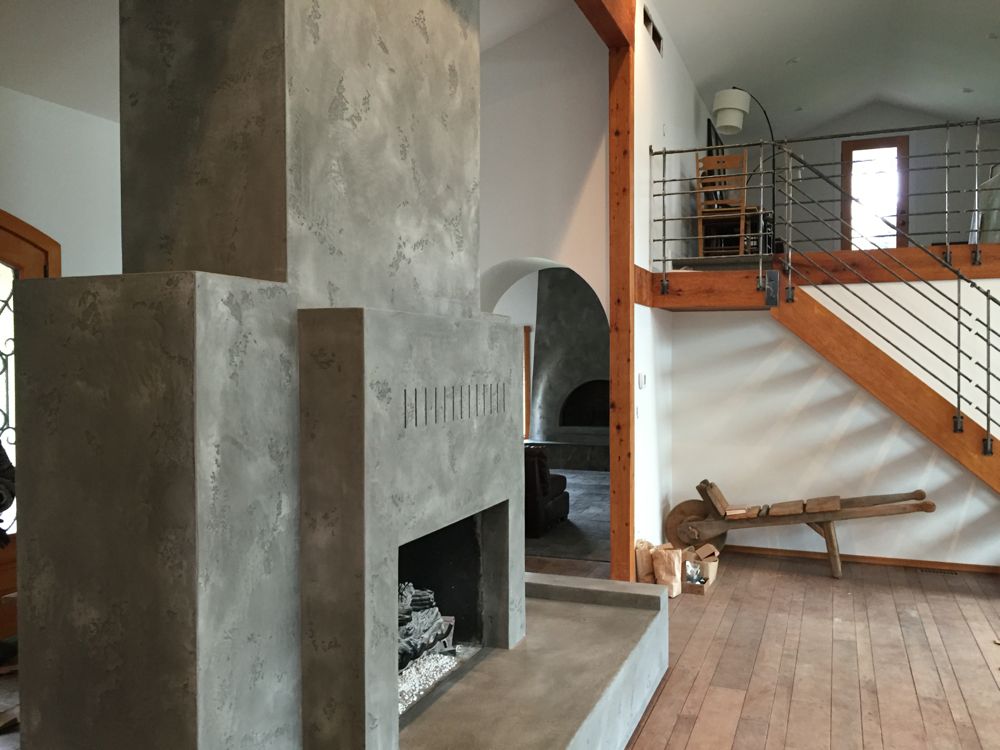
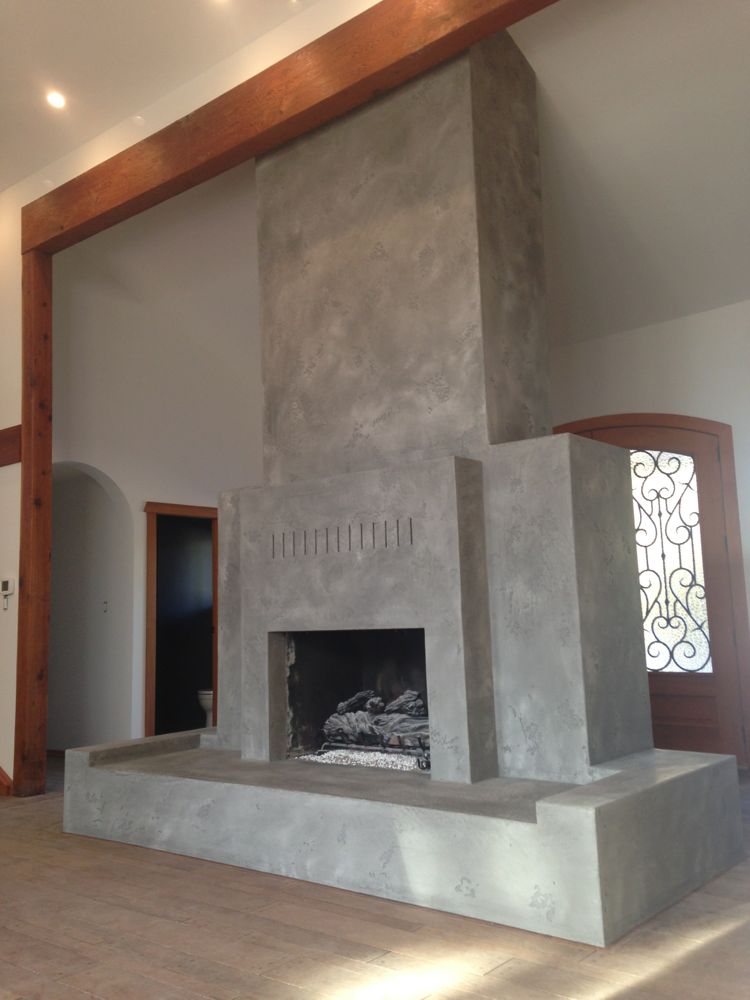
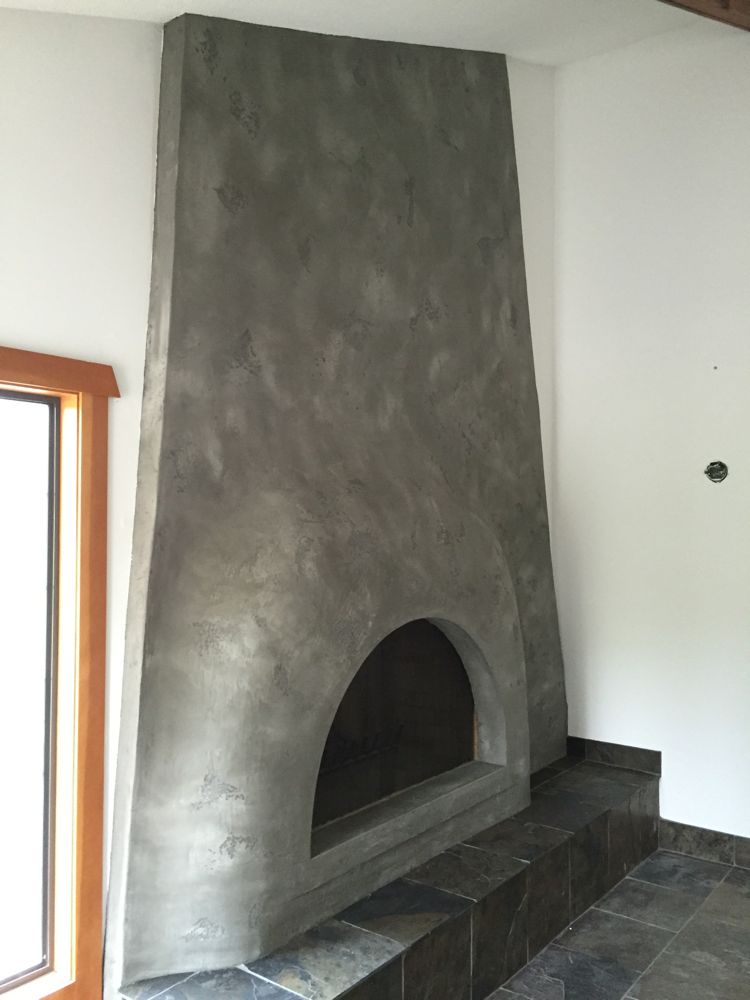
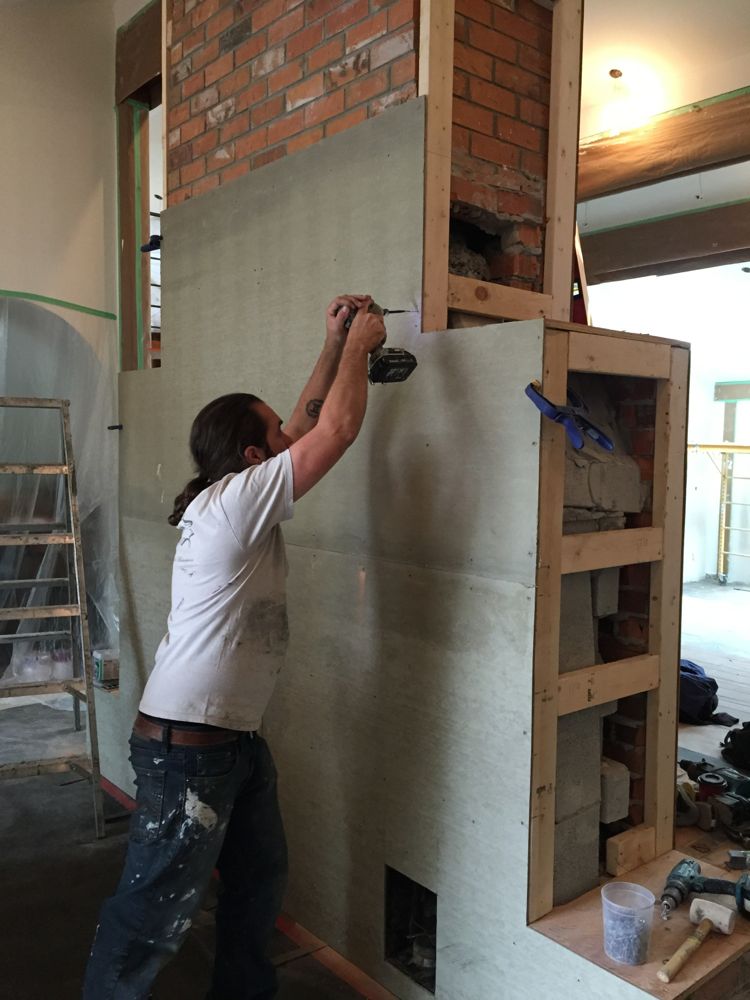
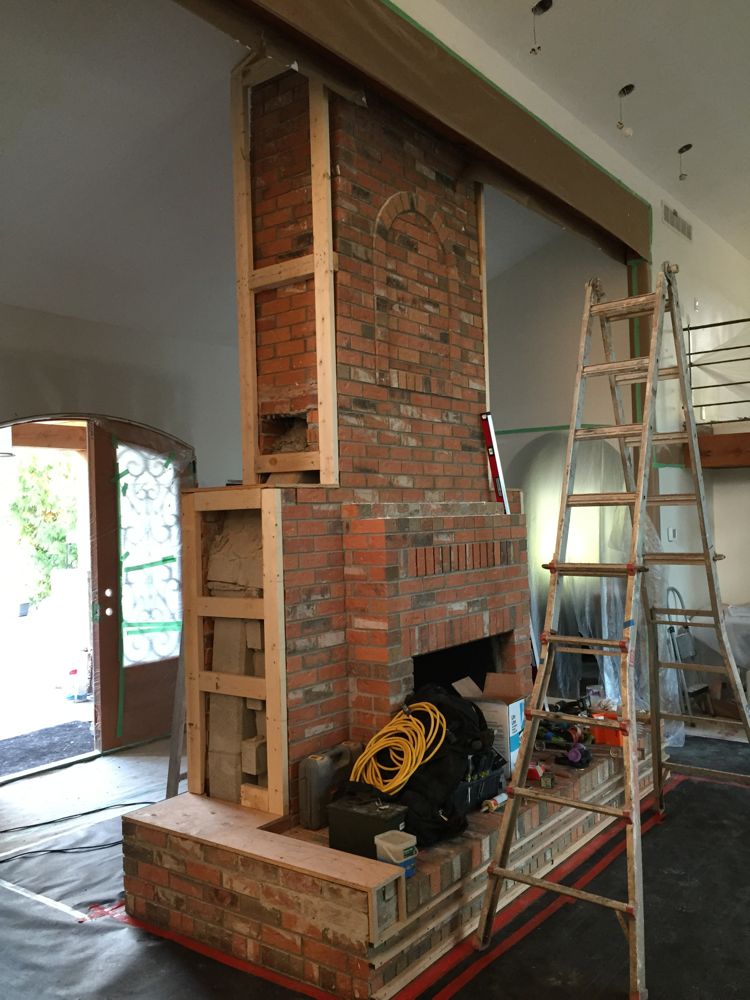
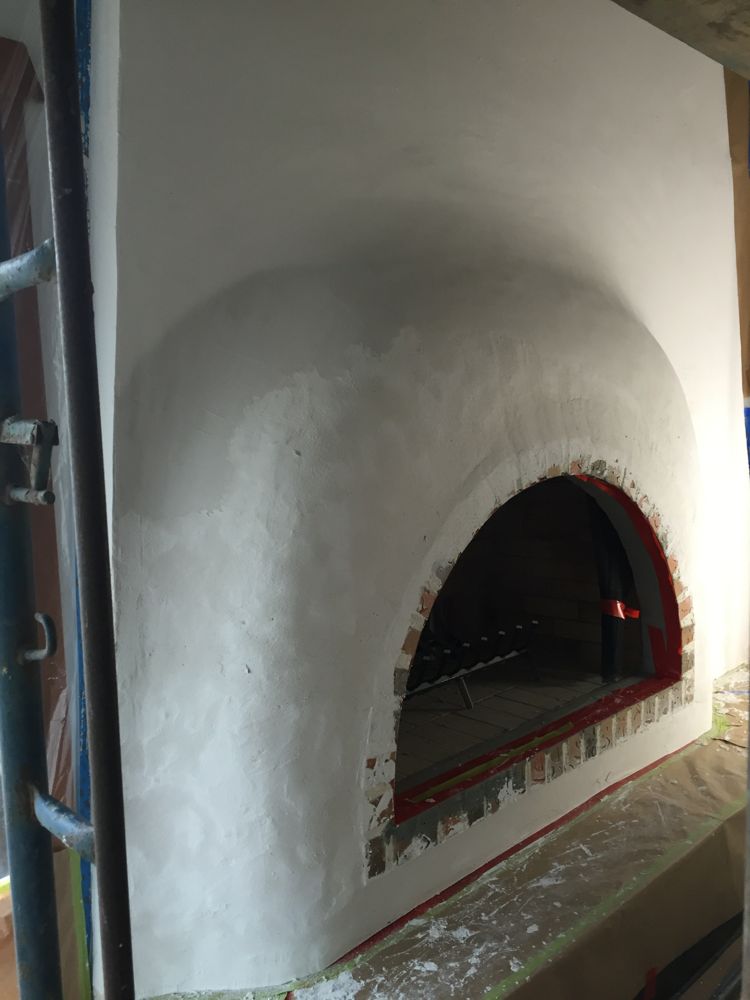
Here’s one of my favourite areas of the whole build: the back patio, with its massive fireplace.

Can you imagine summer nights, friends, wine, a fire crackling, and those towering evergreens all around?

All work and no play makes Darrell and the boys unhappy. I’m no dummy, we can’t have that! No trip, not even a work one, to Banff, Alberta, is complete without hitting the local slopes. Here’s us, off to Sunshine Village for a little powder action.

Sometimes accidents happen… Would you believe a darn tree just jumped right out at me? 🙂

Thanks for sticking around as my epic work adventure continues.

Stay tuned for more soon!

Cheers,
Darrell Morrison


Contact

Office:: 604.628.7855 | Direct:: 604.779.4233 | 9am to 5pm Monday – Saturday

Name
Email
Message

Thank you! Message sent.
Error! Please re-check that all fields are complete.
©Copyright 2019 Decorative Paint & Plaster Concepts Inc.