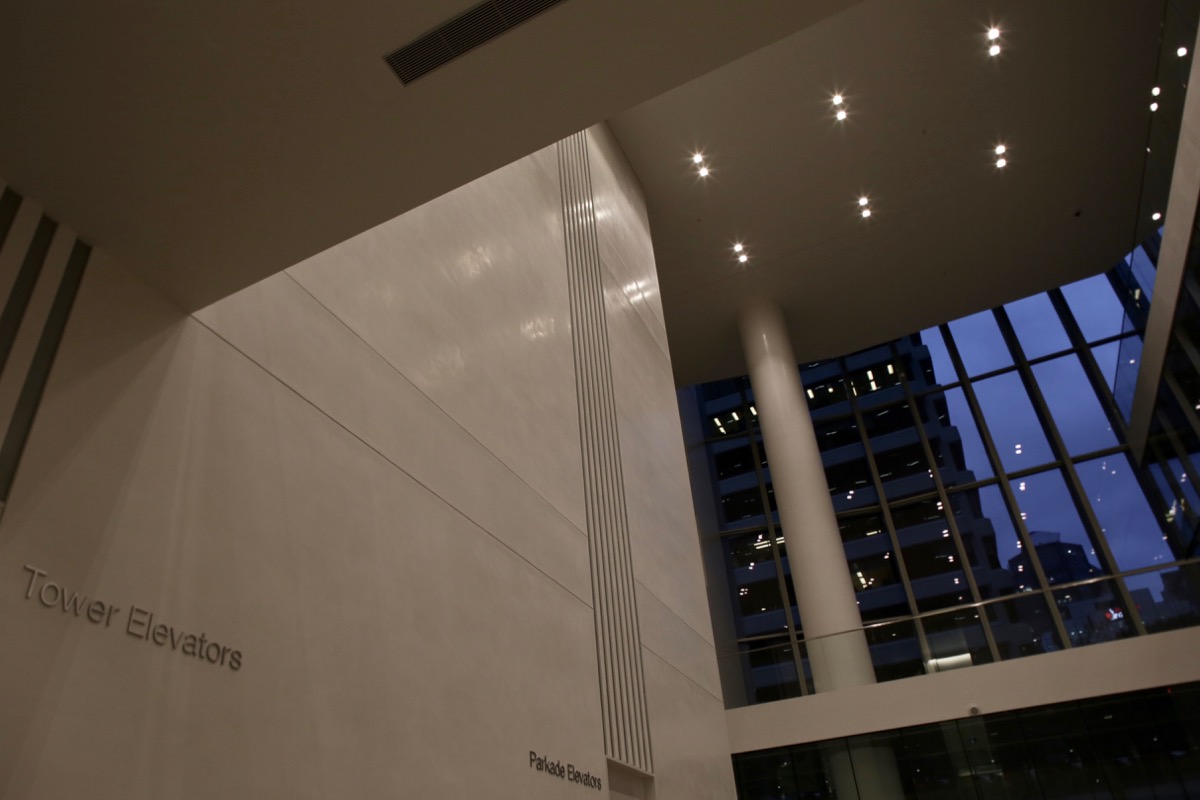
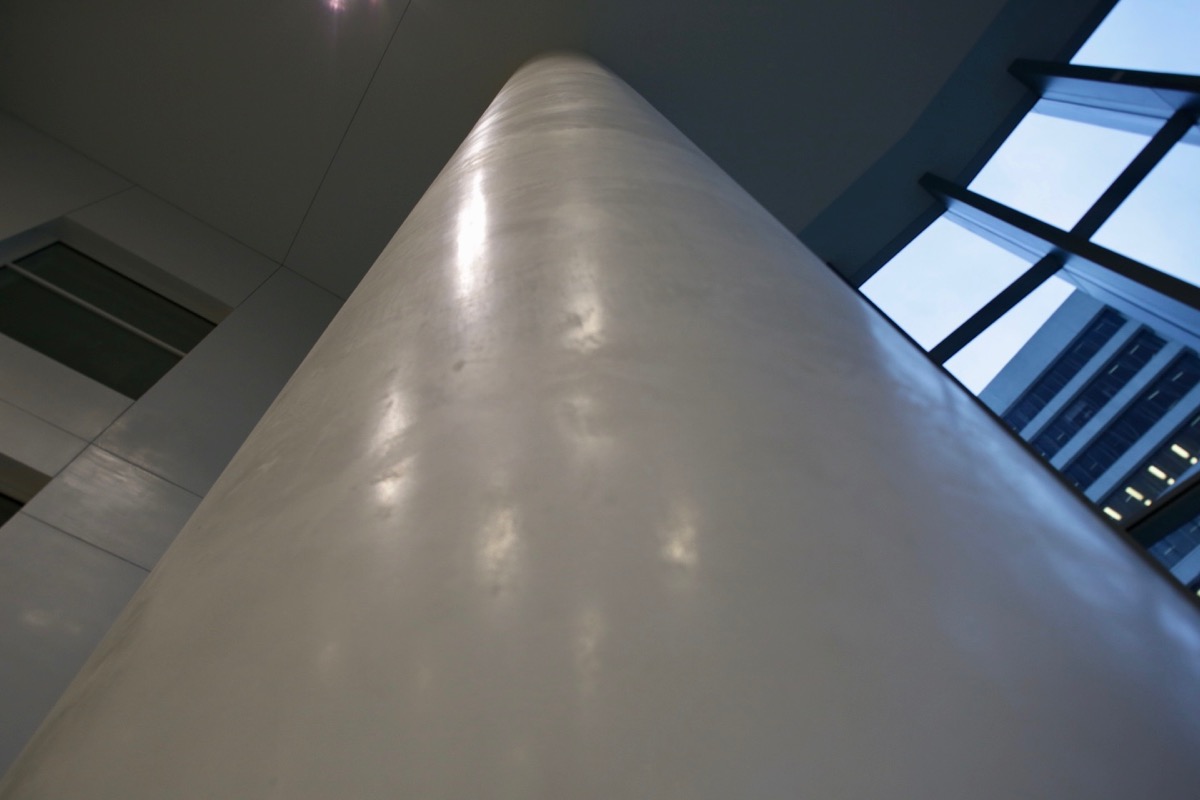
Venetian Plaster In Modern Setting


January 9th, 2012

Venetian Plaster has always been used in Old-World settings like Tuscan Villas, for me though its been a slow start into the Modern realm.

Modern with its clean lines, simple colours and large windows do not usually call for a distressed Old World Tuscan plaster. In 2011 we had two installs of significant modern interior design stature. Keeping to the lighter side of the colour pallet we used a beautiful sand taupe. Here is one of the projects.

What makes me always go back to Venetian plaster is the fact it can be so many sheen’s, from matte to high polish and everywhere in between, its a timeless plaster finish that I will continue to offer in my portfolio.

The Before

With so many colours and finishes to choose from and durability that is far superior to any paint finish, Venetian plaster will be found in Modern and Tuscan homes more and more as the years progress.

[Post to Twitter]  [Post to Delicious]  [Post to Digg]  [Post to Facebook]  [Post to StumbleUpon] 

Tadelakt A Shower To Dream Of In Venetian Lime Plaster


May 28th, 2011

If you know me, you know I’m a busy guy. It’s work, work, work, these days, and when it’s not about work, it’s about time with my wife, my girl, and the pups.

Needless to say, like most of us, I seldom get to do the projects around the home that I dream of doing.

That all changed in the last month, because not only did I finally get to do a bit of home reno that my family gets to enjoy, but I also got to try something I’ve wanted to do for a really long time — a heavy-duty Italian venetian plaster treatment to a bathroom shower stall.

This work was done in our main-floor bathroom, which had been wanting TLC for a while.

Doing any project for the first time, especially when it’s a bathroom, can make it hard to estimate all the work involved, so getting a chance to explore the process on my own time was great.

It was a major project by the time I finished, as you can tell by the end results, but what did it take to get there?

Here’s how the Home Shower Venetian Plaster Project evolved, start to finish.

This ’70s bathroom came with tons of cedar, which all had to come down. Luckily, it was installed by someone who didn’t make much effort to do it right, so only a couple nails in each board ensured they popped right off. Removing the shoddy work made investing time in improving the room that much more satisfying.

The first thing I wanted to do was move the shower-head up by about two feet. No one wants to crouch for a shower.

Before now, I never had the need, or an opportunity, to work with copper. I decided I’d take a kick at the copper can instead of calling a plumber, and working with the pipes was easier than I expected. I might do the odd fix-it job here and there now, but I’d certainly never do my whole place.

Next, I installed plywood. I’m sure some of you building guys out there are wondering “why not concrete board instead of plywood?”

It’s a preference, really. I find plywood’s just easier to work with, and it comes in big old 4×8-foot sheets, making for less cutting in some situations, but, most importantly, I find plywood’s a big help when it comes to installing lath. (Shown later.)

Next up was installing the water-proof membrane. Obviously a quality project is needed for a shower, and I used a local company’s product, called, “SuperSeal” you can learn more about it here.


Then came the lath, and that installation was definitely a two-person job. Getting the lath stretched into and around corners took a lot of force and grunt-work. As we got through that, here’s how it got to looking:

Finally, after all that, it was time to do what I love best — the plastering! First, I slapped up two coats of concrete so there would be a ½-inch seamless base for the lime plaster to build upon. Concrete’s not a pretty project — it’s sloppy, and it made a mess of both a floor and me.


Then came the wait. It took a week — six whole sleeps! — of waiting for the concrete to fully cure, and then I finally got to start the really, really fun stuff — the tinted lime plaster.

I went for a rich, warm colour palette, which really stands up well in the space. Here’s how it looks:


Like most weekend do-it-yourself renos, I ran out of time and some finishing still needs doing on the rest of the details. One day, the countertop will get changed out, and clearly the white curtain needs to go. I just need some 30-hour days, maybe.

It was a fun adventure, one that pays off every time I walk in the room.

Is plaster something you’d consider for a bathroom now? There are a lot of good reasons to choose plaster over tile or other options, and I plan to share that with you in the coming weeks.

Until then, keep checking back — lots of big projects are ahead!

Cheers,
Darrell Morrison

[Post to Twitter]  [Post to Delicious]  [Post to Digg]  [Post to Facebook]  [Post to StumbleUpon] 

The Return From Banff Back To Local Vancouver Projects


May 2nd, 2011

The trip home from Banff, Alberta, was an amazing seasonal drive. As I dropped from the Rocky Mountain highs to the Okanagan, then sea level, I saw things go from end-of-winter to lush and green, full of spring life.

I greatly enjoyed experiencing all four “seasons” this year, thanks to my cold-season work in the mountains and Alberta. It was mostly rain and a really mild winter in Vancouver, not one of our best years, but also not that unusual. It was a good time for a wintery change of scenery, but it’s nice (if a little soggy) to be home.

I’m getting back to making the rounds and taking on local projects. This past week, my team worked on two Valley projects — one in Maple Ridge and the other in Langley. The lengthy drives between home and the two projects took some adjusting, but it’s a great place to drive.

We just finished work on this smaller “feature” barrel ceiling’s plaster treatment. It’s one of those little jobs that starts and finishes quickly.

Italian Venetian plaster like this is where I began working in this trade, and those days kicked off what I hope will be a long and great career. It’s a real treat to work where I got my roots.

Smaller projects like this are always fun, too. Seeing the end result more quickly is a great pay-off compared to the visual impact but long work stint that doing a huge project comes with. I enjoy having a mix of both kinds of jobs.

Decorative Paint & Plaster is back in town and we’re booking clients for the next two years. How can we help you?

[Post to Twitter]  [Post to Delicious]  [Post to Digg]  [Post to Facebook]  [Post to StumbleUpon] 

Grandview Business Center, Venetian Plaster Interior


December 2nd, 2010


Guess what I’ve always dreamed of scratching off my bucket-list? Plastering a high-end commercial building.

Soon, I’ll be scratching it off! (Or I can change the bucket list to “super-big high-end commercial building,” maybe. Then, after that, add “downtown”.)

Starting April, 2011, I’ll be starting an amazing adventure with my team as we begin a massive lime plastering project in the Grandview Business Centre in South Surrey, BC.

It’s a great building, an important part of the new “Morgan Crossing” district, which is an area that has just exploded over the last two years.

The mall, The Shops At Morgan Crossing, has great businesses like the Steve Nash Sports Club and a favourite of mine, because we all love a good wine: the “Everything Wine Store”.

Located so close to the mall, the Business Centre’s a great location for professionals looking to be accessible and convenient for clients.

All right, let’s talk project details.

The Builder Double V Construction will be creating the blank canvas for this amazing project.

We’ll be putting lime plaster in all the common spaces (including lobbies, corridors, and washrooms) on the Morgan Crossing Business Centre’s 1st, 3rd, and 4th floors.

We’ve chosen the palette already.

The corridors will be a slightly polished sandy/cream-coloured lime plaster with subtle pitting and black flecks.

Washrooms will be treated with a cement-based plaster that incorporates subtle pitting, almost like a honed travertine, but seamless and free of any joints.

The lobby ceiling will have a shiny finish that resembles the look of polished marble.

I can’t wait to see so much of my work in one place. A lot of what I work on is in private homes, but this will be a project that I can “visit” for years to come — and close to home, too.

Stay tuned while I prepare for this awesome undertaking, because I plan to share the journey with you by blogging the process in words and video while things come to life.

Cheers,

Darrell Morrison

[Post to Twitter]  [Post to Delicious]  [Post to Digg]  [Post to Facebook]  [Post to StumbleUpon] 

Italian Lime Plaster Interior Alberta “The Progress Week 2″


November 26th, 2010


So, over the past week I have experienced some of the coldest temperatures of my life,
-31 plus the wind chill. Ya it’s really freaking cold.

When the Millworkers from Victoria, British Columbia asked if I was really excited about going to Banff in the winter, I had no idea what was coming. Am I still excited “absolutely”. I’m just really cold.

But enough about me and freezing my butt off, let’s get to the progress on the house I’m here to transform.
This week I have seen some major progress on the drywall and I mean “Major”!!! From floor to floor everyone is hustling. Millwork is flying, drywall dust is falling. Well not really. I was able to save the owner and builder extra time as a 2 coat tape and mud drywall system is all that’s needed for my plaster finishing.

Check the progress everyone has made.


Look at the depth and authentic beauty we have been able to achieve using Stucco Italiano’s Intonachino

A four coat plaster system is what we are installing for this project. We sure don’t get the normal coverage, but this house is far from the norm.

Lots of polishing is required to achieve the finished product for this particular project.


Here is a wall in the drying stage which I like to call the “Ugly Duckling” stage. Its one of the worst times to analyze my work.

I am a big protector when it comes to my work and the other trades around me. For this project I ordered 1500 sq ft of 1/8 inch hardwood underlayment. I am using it to protect all the corners and Millwork.

Everyone has their own opinion of the finished Italian plaster. Most say it resembles suede or leather. My only thing is “don’t touch till it’s sealed please”. :-)

Thanks for coming along on the journey to Banff. I hope you have enjoyed the progress this week and will stay tuned to for what’s to come. Some big walls and ceilings are coming over the next 2 weeks.

Cheers
Darrell Morrison

[Post to Twitter]  [Post to Delicious]  [Post to Digg]  [Post to Facebook]  [Post to StumbleUpon] 

Venetian Plaster Interior Banff, Alberta Week 1


November 19th, 2010

I remember my parents telling me their stories about how hard life was “back in the day,” when they’d have to slog through heavy snow, up snowy hills, all while braving the freezing weather. Now that I’m working in Banff, I can finally tell my daughter the same kinds of stories.

Except that my stories will involve my struggles this week — hauling some 2,650 pounds of Italian lime plaster up a snowy, icy hill, down some stairs to the lower level’s entrance, and all in chilly -14 degrees Celsius weather.

Yep, just another wintery day’s work in Banff, Alberta.

Laying down the base coat

There’s a reason they call short people “vertically challenged,” and my work in Venetian plaster and the constant need to do ceiling treatments means I’m proof of the “challenged” part.

Ladder, please!

I often need a little extra height, and that perfect height still means a world of work but a lot less pain!


Living and working in one of the mildest climates in Canada means I’ve never experienced the difficulties of building in high-altitude severe winter climate like that found here in Banff.

I’m enjoying seeing how different practices are needed for success here, and I’m super-impressed with how the builder deals with nature’s wrath, tenting exterior areas so the work on the home’s landscaping can continue throughout the season.


This is the exciting part, for me! Just last week, the main floor had barely any drywall hung. That was then and this is now! The build team has really pulled together, everyone’s always on the move, and they’re working as a team to get ‘er done. There’s a lot of good nature on the build site, with everyone being very friendly and communicating clearly, all things that are very important to me in a work environment.

It feels wrong to post without sharing another photo of the area. Here’s the town as we head to our lodgings after a day at the job site.

Banff is such a lovely place. I have so much more of it to experience while I’m here, and that’s really exciting. It’s not just a mountain town, it’s a winter wonderland, and it’s feeling like an epic journey’s just getting started. Thanks for following the experience!

Cheers,

Darrell Morrison

This Week’s Banff Trivia:

Geologists report that the Rocky Mountains that make up Banff National Park are 45 to 120 million years old. In just the national park alone, one can find more than 1,000 glaciers — but only if they wear really, really rugged hiking boots!

[Post to Twitter]  [Post to Delicious]  [Post to Digg]  [Post to Facebook]  [Post to StumbleUpon] 

Italian Lime Plaster Interior In Banff, Alberta


November 12th, 2010

Early last Monday afternoon, I drove past a sign reading “Welcome to Banff, Alberta.”

Over the next three months, I’ll be working on an amazing, extremely customized home that backs onto Banff’s beautiful Bow River.

Along with everything else that blows me away about this house is the fact that I think it has the most stunning millwork I’ve ever encountered anywhere. Entering this amazing home felt like I’d just walked into some mind-blowing 5-star hotel in, well… Banff.

To add to the dramatic millwork and scenic setting, I’ll be using rich, deep earth-tone colours that complement the amazing nature all around us here in these legendary mountains. The plaster will be a 4-coat slightly-pitted Intonachino lime plaster finish.

The Canadian Rockies, where Banff is found, is known for its stone, exposed rockface, forests, and generally rugged terrain. I think this Italian lime plaster will really rock the Rockies, and it’ll be a commanding, dramatic feature in this impressive home as it stretches throughout the place, on all three levels.

I know this mountain town will be an amazing and inspiring place to work during the winter months. Come spring, if the owner converts the place into a “mountain stronghold,” it’ll be a beautiful place to hole up and easily forget about the rest of the world.

Banff is the highest town in Canada, sitting at an elevation of more than 4,500 feet (about 1,380 metres), nestled in the heart of the Canadian Rockies. It was declared Canada’s first national park in 1885, and today is a UNESCO World Heritage Site, with a protected area of more than 7,700 square miles.

The Bow River, which this home backs onto, originates from the Bow Glacier and Bow Lake. It flows for 587 kilometres, joins with the Oldman River to become the larger South Saskatchewan River, and eventually spills into Canada’s famous Hudson’s Bay, halfway across the country.

[Post to Twitter]  [Post to Delicious]  [Post to Digg]  [Post to Facebook]  [Post to StumbleUpon] 

Massive Tadelakt Fireplace Resurfacing


October 5th, 2010

Now you’ll see I don’t exaggerate. I said this Tadelakt fireplace was massive? It was HUGE!

Stretching 16 feet across and with a towering peak of 11 feet, you can see why such a dominant feature made nailing the perfect colour the most important step in planning. But, hey, it’s always about “the perfect colour”.

Remember, I’ll always be happy to mix tints as often as it’s needed to make sure it’s a colour you’ll love living with well into the future.

Back to the massive fireplace: When you take a built-in entertainment centre/room feature and want to turn it into something bold and grand, while still adding value to your home, natural lime-based Venetian plaster is definitely the way to go. Remember that, it’s not just a cosmetic change — it’s adding value with beauty.

But, here, take a look for yourself.

“After”:

“Before”:

Here’s the soon-to-be Tadelakt fireplace. Mean, green… and wow! Could be a show-stopper if it’s finished right… but that’s why they hired me, because my company only does it “right”.

Our first step was building up the mantle for added size and drama, by using a 16-foot piece of 2×6 and some crown moulding. Et voila! There’s some beautiful architectural detail.

After finished beefing-up the mantle and the build was done, it was
time to figure out the posts for the bulk of the Tadelakt fireplace
application. This transformation really took it to the next level of
super-cool, don’t you think?

Look closely. Do you see both the bulk and pure “flow” those legs added? We felt it gave exactly the character needed to make this fireplace a feature to envy in an already-upscale neighbourhood.

Next came the real treat — doing the actual Tadelakt lime-plaster application. That’s when I get to feel like we’re putting icing on a cake. This, though, was a tricky cake.

You know me, I love a challenge. Personally, this profile was like nothing I had ever Venetian-plastered before. The detail, curves, and
difficulty reminded me of a lonely country road on a winter’s morning — a great pleasure to be on, but taking it slowly and carefully would
be essential, while knowing that patience would be rewarded with beauty.

Do you see how I used an orange mesh for tying the pieces together? This step is a massive pain, and really not a fun part of the project, but when it comes to a curved profile and the added degree of artistic difficulty that comes with it, that grief is worth the effort just for the extra years of architectural integrity it gives the project. It’s like your mom always told you, “Anything worth doing is worth doing right.” That’s how I operate, too.


Now the project is complete and the space has taken on a whole new look. It’s no longer a built-in piece of drywall, but a long-lasting element for the room, and a focus of the home that can be built upon for years. This fireplace will surely remain a strong selling point for as long as the home stands, because we built it to last.

I’m glad you popped in for a look at my recent work. Thanks for reading!

Cheers,
Darrell.

[Post to Twitter]  [Post to Delicious]  [Post to Digg]  [Post to Facebook]  [Post to StumbleUpon] 

Venetian Plaster Ceilings: Red and Orange


August 1st, 2010

Here’s a teaser video of my current project — some of the Venetian plaster we’ve completed so far in this home, using distressed red & orange Intonachino, with a raw umber glaze that I finished off with a highly-polished wax.

[Post to Twitter]  [Post to Delicious]  [Post to Digg]  [Post to Facebook]  [Post to StumbleUpon] 

Moving On Up — Tuscan Lime Plaster’s Main Floor is Complete


July 17th, 2010

Since early June, I’ve been working on this large full-interior lime plaster project. By “large,” I mean a whopping 10,000 square feet.

For me, I find it really amazing to see all the progress as I watch the Venetian plaster come together, and I thought I’d share some photos of the process so far, since I think you’ll like it.

This really is a massive project and something like this needs a lot of careful work even before it begins. With 10,000 square feet to dress up, it took a lot of colour-picking with the clients. We had eight colour changes and it was quite the struggle to nail the exact texture, but we stuck to the discussion until everyone was happy — something I don’t take lightly. I’m always up for making sure my clients have what they want on the palette before we get going. Isn’t that the whole point of the work? The client?

To start the project, I finished the ceilings off with Stucco Italiano’s Intonachino X-Fine because, with it, I could create the perfect amount of distressing in the texture.

We got the ceilings done before a final colour had been chosen for the walls. Was that a dilemma? Yup, you bet it was. We started on the walls anyhow, and the whole project slowed to a crawl because we could only basecoat the walls while I continued working towards the orangey-gold tones the client was after.

I find one of the tough things for clients is how to visualize the way things will look in the end. I’m an artist, I can visualize, but I understand why they can’t. Thankfully, technology’s starting to really make life simpler that way. I recently picked up an Apple iPad and loved how easy it made the client’s colour decision after I used it to highlight a few scenarios.

With my iPad, I pulled up some photos of both projects and concepts I thought would work well in this client’s space. I used it to show how using two colours can add a great deal of interest and movement on the walls. Doing all of this on a jobsite on a Sunday was a great deal of fun for me. I showed the client on the iPad, then jumped right into mixing a sample and showing the client how it all comes together in reality, right then and there.

With the iPad showing a wider vision and my skills showing the up-close in-person look, the colour and finish got approved, and here I am, already done with the main floor!

Here are some of the pictures of what’s happened so far, and I hope you enjoy them as much as the client does.

[Post to Twitter]  [Post to Delicious]  [Post to Digg]  [Post to Facebook]  [Post to StumbleUpon] 

Next Page »